Directions
To Cook
- Combine the dashi stock, soy sauce, cooking sake and mirin. Place the rice and seasoned dashi stock into rice cooker and cook with normal rice function.
- When the rice is cooked, mix with a rice spatula so that the flavoured rice is evenly mixed.
To Make Sushi Bears
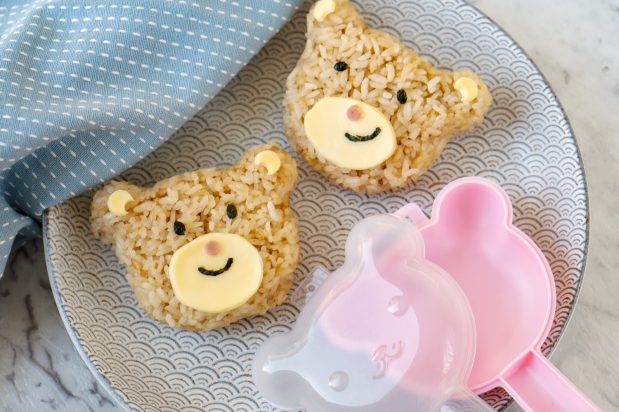
- For each sushi bear, scoop ⅓ of the rice into the bear onigiri mould, close the lid and shake well until the bear shape is formed. Place the sushi bear on a plate.
- For the ears, use a bubble tea straw to press onto the sliced cheese to create a circle. Then use a toothpick to remove the cheese from the straw. Repeat once to make two circles.
- With a normal straw, press on the edge of the cheese circle to create a crescent shape. Use a toothpick to spread some mayonnaise as glue on the cheese and place onto the bear’s ears.
- For the face, use a pair of scissors to cut an oval shape from the cheese, place onto the bottom part of the bear’s face.
- For the nose, use a normal straw to press onto the sliced ham to create a circle. Alternatively, cut out a circle from nori sheet as the nose. With a tweezer, pick up the ham and dip a little mayonnaise on the back and stick onto the top position of the oval cheese.
- For the eyes, use a panda nori puncher to punch the nori sheet. Keep the panda eyes and discard rests. Alternatively, use scissors to cut the nori sheet. With a tweezer, pick up a nori eye and dip a little mayonnaise at the back, place onto the sushi bear. Repeat for the other eye.
- For the mouth, use a smiley nori puncher to punch the nori sheet. Keep the smile and discard the rests. (Alternatively, use scissors to cut the nori sheet.) With a tweezer, pick up the smile and dip a little mayonnaise at the back, place the smile underneath the nose. You can play with different positions and angles to create different look!
- Serve the sushi bear on a plate or in lunch boxes.


 (4)
(4)
 (4)
(4)-453x300.jpg)

You must be logged in to post a comment.